Installation
The ProtoPixel Node is fairly plug-and-play: It should work in most situations just by connecting it to the network (by means of an ethernet cable) and power.
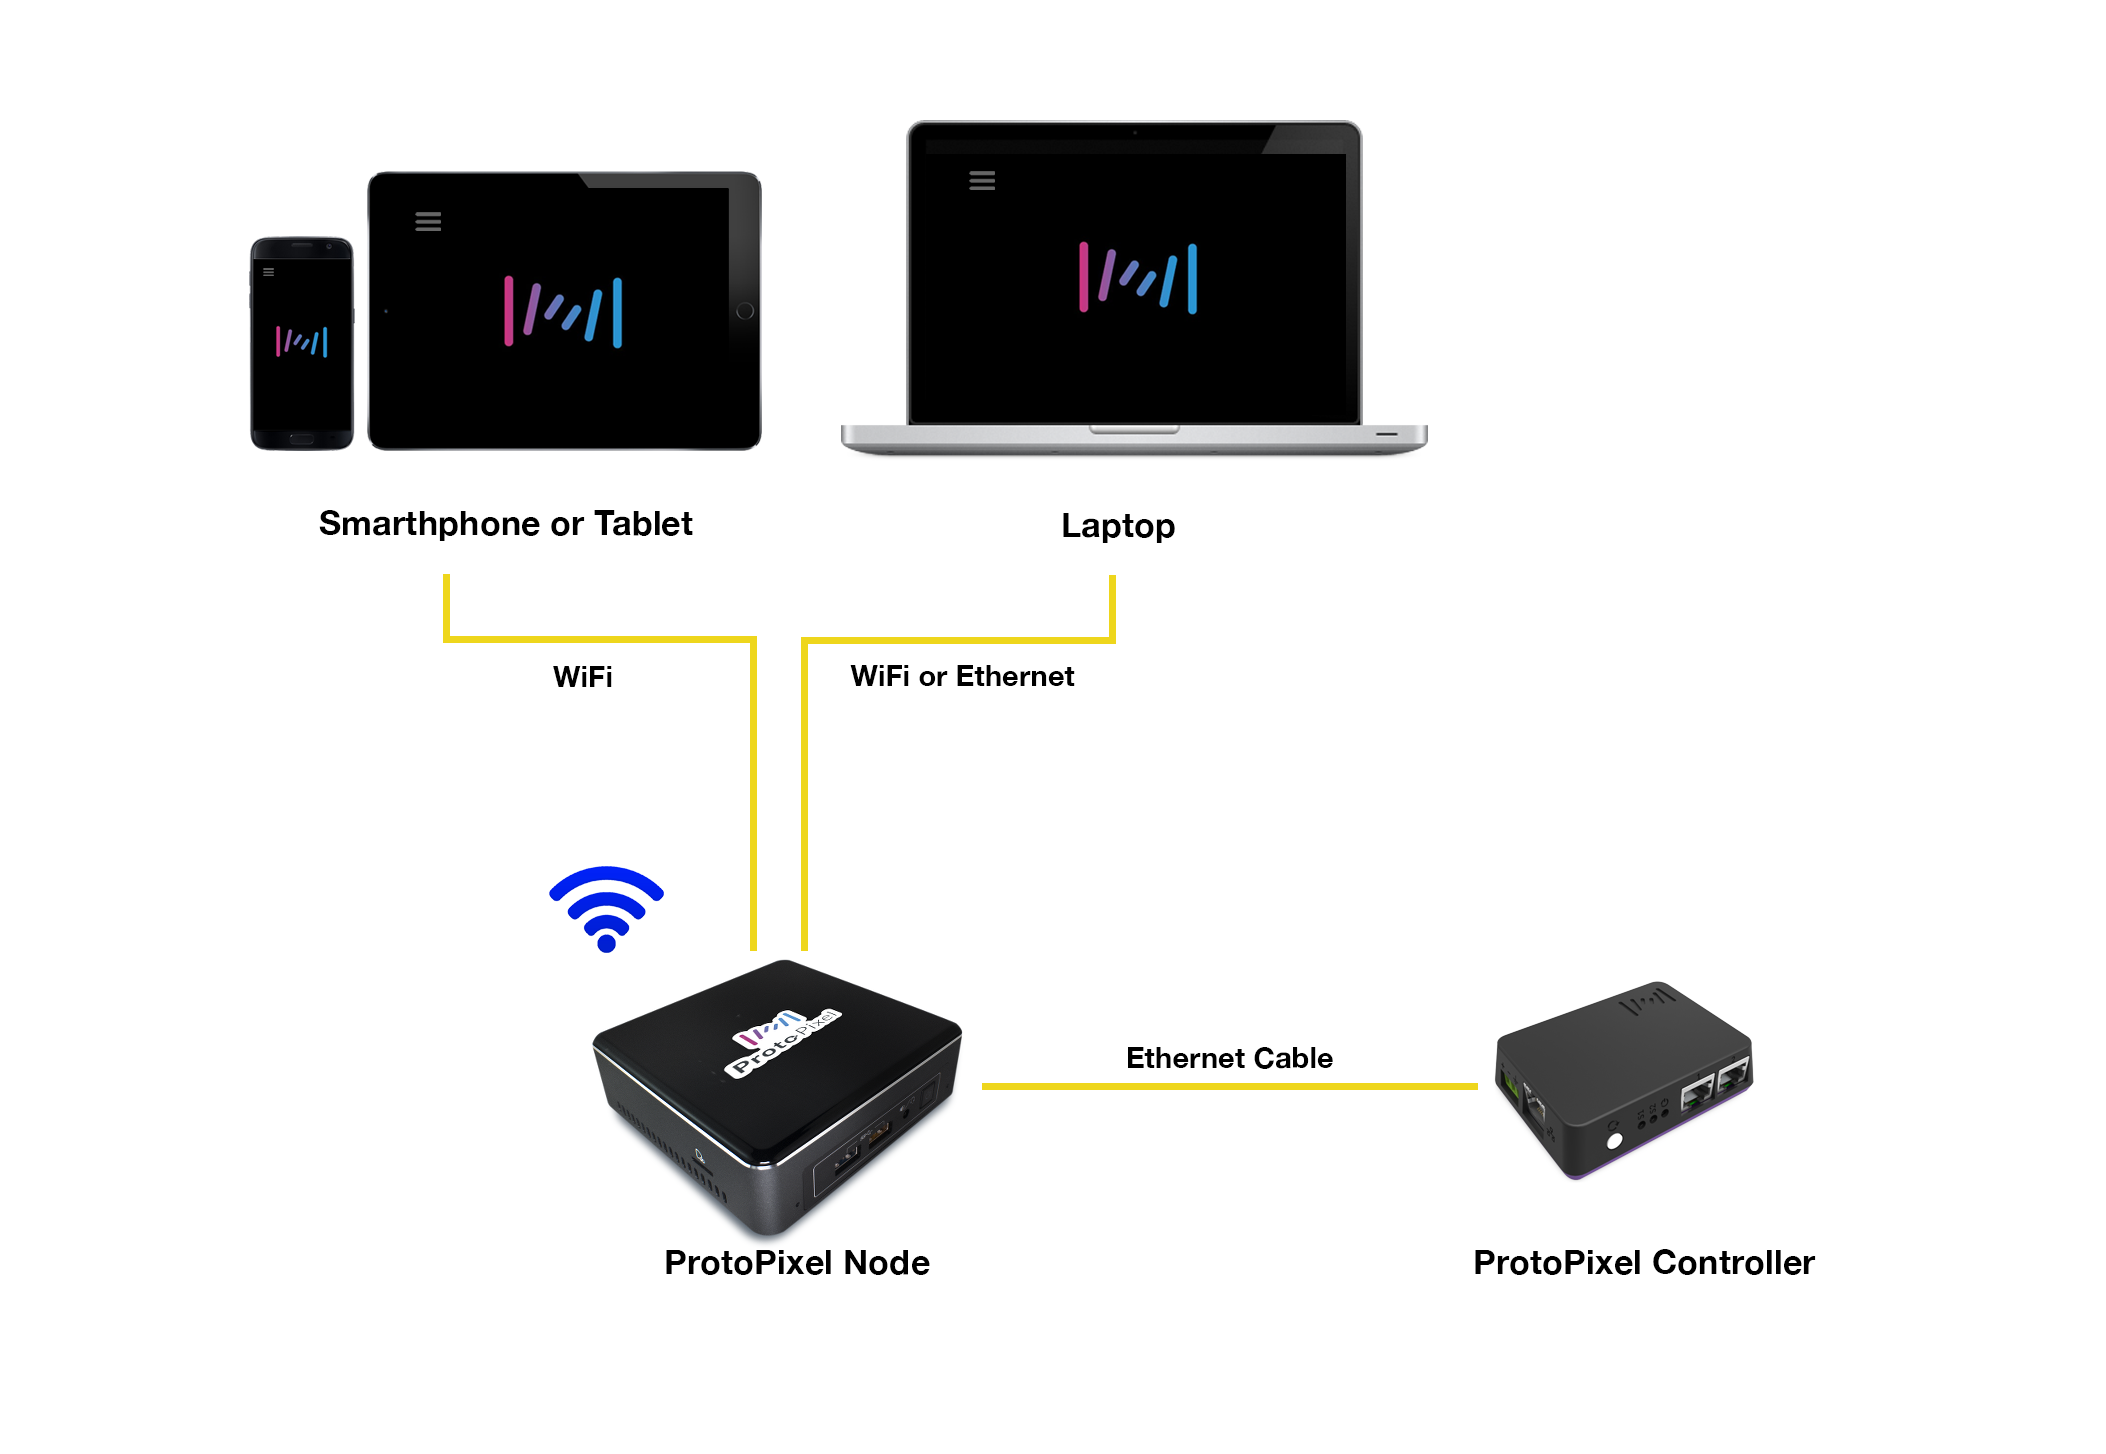
Network connections in ProtoPixel Node
The structure of your network is very important though. If you want to experience an easy setup you need to connect everything to a modem or router. This way all your devices will be able to communicate on their own using a technology called DHCP, provided by that central device.
Network configuration
Easy setup (DHCP)
Any network connected to a router or modem (to the internet) will typically have DHCP enabled, so you should be able to skip the rest of this page.
DHCP will allow your ProtoPixel Node to auto-configure its network connection and to make itself visible to other computers and ProtoPixel Controllers on the same network.
Manual setup
In the rare case of not being able to use DHCP, your Node will assign itself to 192.168.133.100, its default IP.
In this case your setup will likely not work out of the box because your Node will only operate on a specific, isolated subnet. To change it, you should:
- Open a web browser
- Navigate to the default IP
- Open your Node’s Network Settings
- Configure it yourself to suit your needs
Using your Node’s own wifi access point
When you turn on your Node, it will open its own wifi access point so that you and other users of your setup can interact with it directly.
To connect to it, look for a wifi named something like ppxnode-ABCDE## and input your password (by default, password).
By default, when you are connected this way, you will find the Node at 192.168.8.1.