Operating a ProtoPixel Node
Most of the operations in a ProtoPixel Node can be done through its WebApp, either on desktop or on mobile.
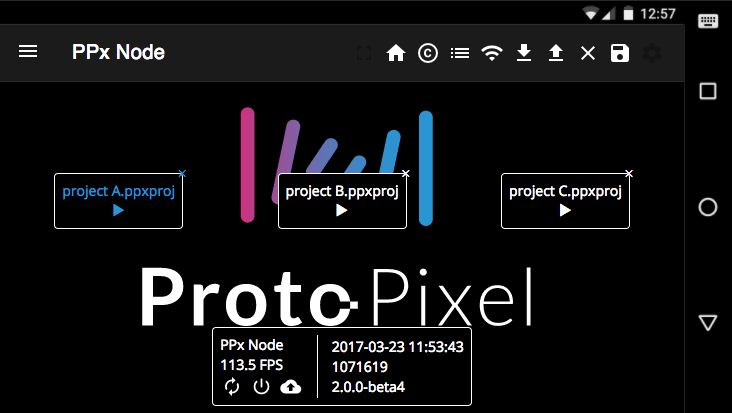
Node Web App on mobile.
Accessing the ProtoPixel Node WebApp
You can access a Node’s webapp using ProtoPixel Create from your computer: just go to and click on the detected Node. This will open a web browser pointing to the WebApp of that Node.
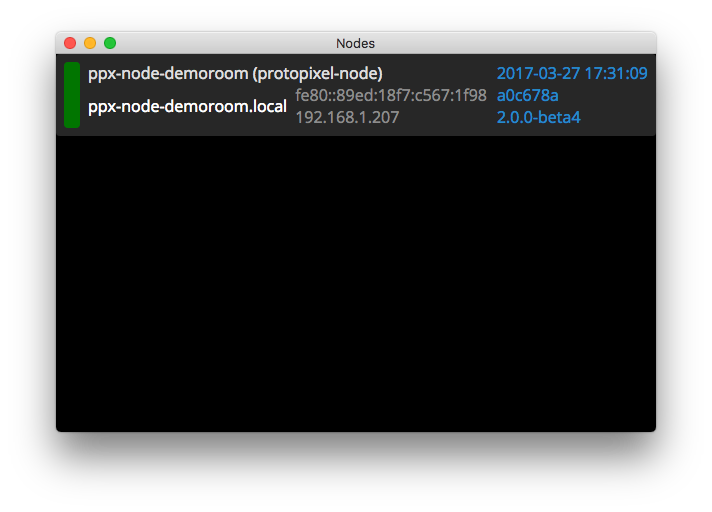
Nodes found in current network.
If you have access to the internet while connected to the same network as the ProtoPixel Node, you can use http://find.protopixel.io to find the Node, in a similar way as using ProtoPixel Create. This only works for simple LAN configurations.
Also, you can access the Web App with Node Name (“ppxnode-ABCDEXX”) by composing URL like http://ppxnode-ABCDEXX.local/. Please note the / at the end. Some devices, like Android ones and many Windows-based ones can’t use this address.
Alternatively, if you already know the IP address of your ProtoPixel Node, you can access its Web App by writing its IP directly in the address bar of your browser. Default static addresses are 192.168.133.100 for the wired interface and 192.168.8.1 for the wireless interface.
Sections of the WebApp
The Node has the same WebApp as ProtoPixel Create (described in webapp) but it also has some additional features
Icons on the top bar.
From left to right:
- Global Settings
- Scheduler
- Fullscreen current content (will go to the current content URL)
- Return to the main screen, where we have the Node panel
- Go to the subscription management page
- Go to the Node’s log page
- Go to the Node’s network settings page
- Download the Node’s current project
- Upload a new project to the Node (the project needs to have been exported from ProtoPixel Create)
- Close the Node’s current project
- See the current content settings
Note that not all icons will be enabled in all circumstances.

Uploaded projects.
Your uploaded projects will appear in the center of the landing page.
- To run a project, press ▶ (you can only run one at a time)
- To delete a project, press ✕.
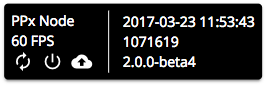
Node control panel.
The admin page of your node. Here you can:
- See the Node’s current FPS to detect performance issues
- Restart it
- Shut it down
- Upload a new software version
- See its current software version and build time
Global Settings
You can access to the same Global Settings of ProtoPixel Create in this page.
Scheduler Interface
You can access to the same Scheduler capabilities of ProtoPixel Create in this page.
Network Settings
Press ![]() to open the network settings menu.
to open the network settings menu.

Network Settings menu
Here you will be able to see and change some of the network settings of your Node. This is an advanced setting and you should be sure that you know what you are doing.
dhcp_enabledTo enable or disable DHCP in your Node (we recommend that you keep this on)fixed_ipTo change your Node’s default ethernet IP addressfixed_maskTo change your Node’s default ethernet maskfixed_gatewayTo change your Node’s default gateway. Please only use this with DHCP disabled.wifi_enabledTo enable or disable your Node’s wifiwifi_ipTo change your Node’s default wifi IP addresswifi_ssidTo change the name of your Node’s wifi access pointwifi_passwordTo change the password of your Node’s wifi access pointdefault_content_interfaceTo define a content to show its remote interface as the root (/) of the webapp. When defined, to access to the usual admin interface then use/admin.
Be aware that your Node has 2 static IP addresses, one for the ethernet cable (if plugged) and one for its wifi access point.
Note
You must restart the ProtoPixel Node for network changes to take effect.
Common operations
Here are some common operations you may want to perform once you have access to your Node’s webapp:
Uploading a project to your Node
There are two kinds of PPx project types:
- The bare project is a file with a
.ppxprojextension. It is created when you save a project with the Protopixel Create software. It only contains the essential parts of your project. - The bundled project is a file that also has a
.ppxprojextension. It is created when you export a project with the Protopixel Create software. It contains a bundle of all assets needed to run your project.
To run your project in your Node you will need to upload a bundled project. To do so, first open ProtoPixel Create and export your project ( Cmd-E or ).
Then, on your Node’s webapp, click the  icon on the top bar, then select your exported project and wait for it to upload. Your project will now appear on the webapp’s front page.
Switch between uploaded projects
As explained above, when you have more than one project uploaded to your Node you can choose wich one to run by going to the webapp’s home page and pressing the ▶ button on your project. If there is another project currently running your Node will shut it down before running the new one.
Deleting an uploaded project
When you have at least one project uploaded to your Node you can choose to eliminate it by going to the webapp’s home page and pressing the ✕ button on your project.
Updating your Node’s software
When a new Node software update comes out, you will be able to update your node by pressing  on your Node’s control panel. This operation needs the Node to be connected to the internet.
To update the Node software manually, in case the above method fails or because there is no internet access, download the updater project from the node release archive and upload it as a normal exported project. The node will update itself and reboot. You can then safely remove the project in the Node WebApp.
Power management
Use  to restart your Node.
Use  to shut down your Node. You will have to start it up manually after this.