Manager
When using ProtoPixel Node to control the lights of a store, a restaurant or even your home, you may need a way to easily control which contents you want active for which fixtures, or even to create predefined scenes.
Manager is the ProtoPixel Node App that allows any user to control a protoPixel light installation in an easy and intuitive way from her phone, tablet or computer.
Main View of the Manager
How it works
When designing your lighting scenario in ProtoPixel Create, add and map all the contents you want to use later in the venue. Then distribute your fixtures into Zones, by assigning the Zone parameter in the inspector panel. These Zones will help you assign contents to fixtures (all fixtures in the zone) easily.
You should also add contents to these Zones. Contents whith a setted Zone will only be available to the fixtures of this zone.
Then just export the project and upload it to the Node.
Accessing the Manager App
From the admin interface, click on the manager icon. You can alternatively go directly to http://ppxnode-ABCDEXX.local/PPxManager/.
Activating the Manager
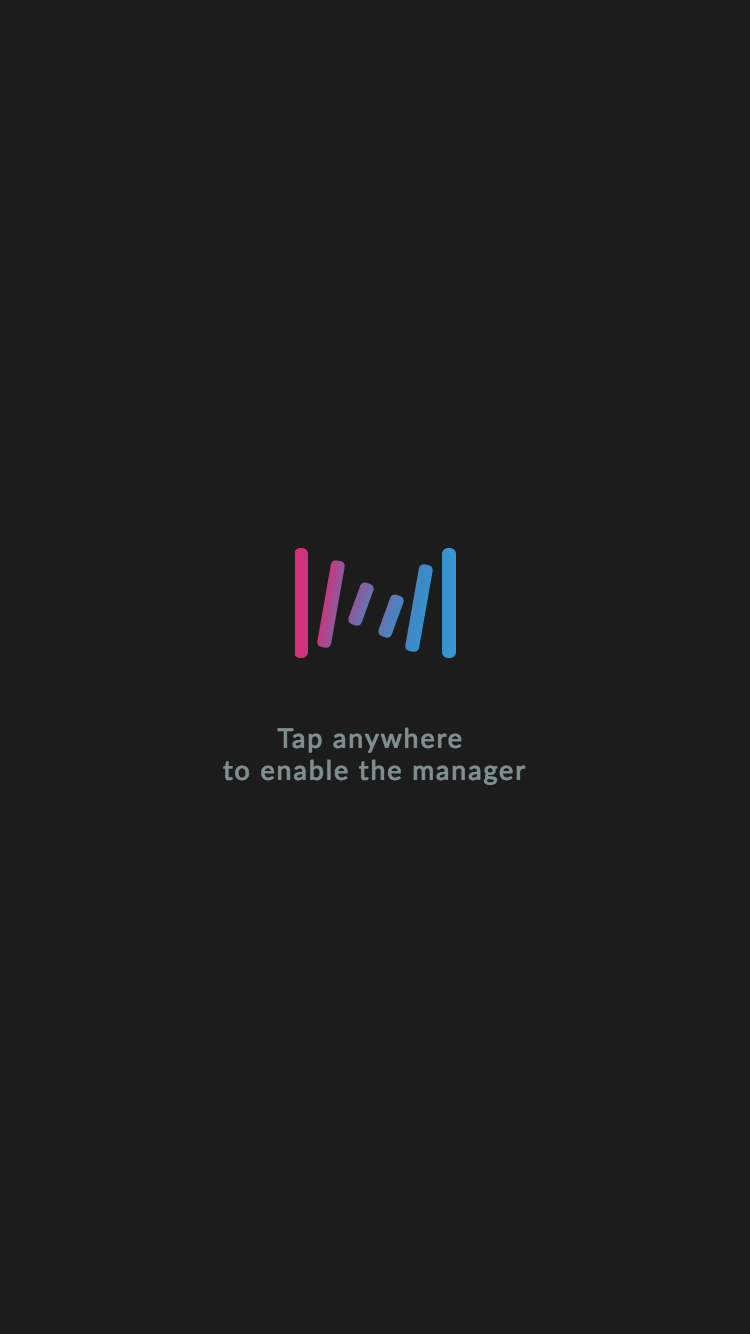
When accessing the manager, if it is not active you will be asked to activate it.
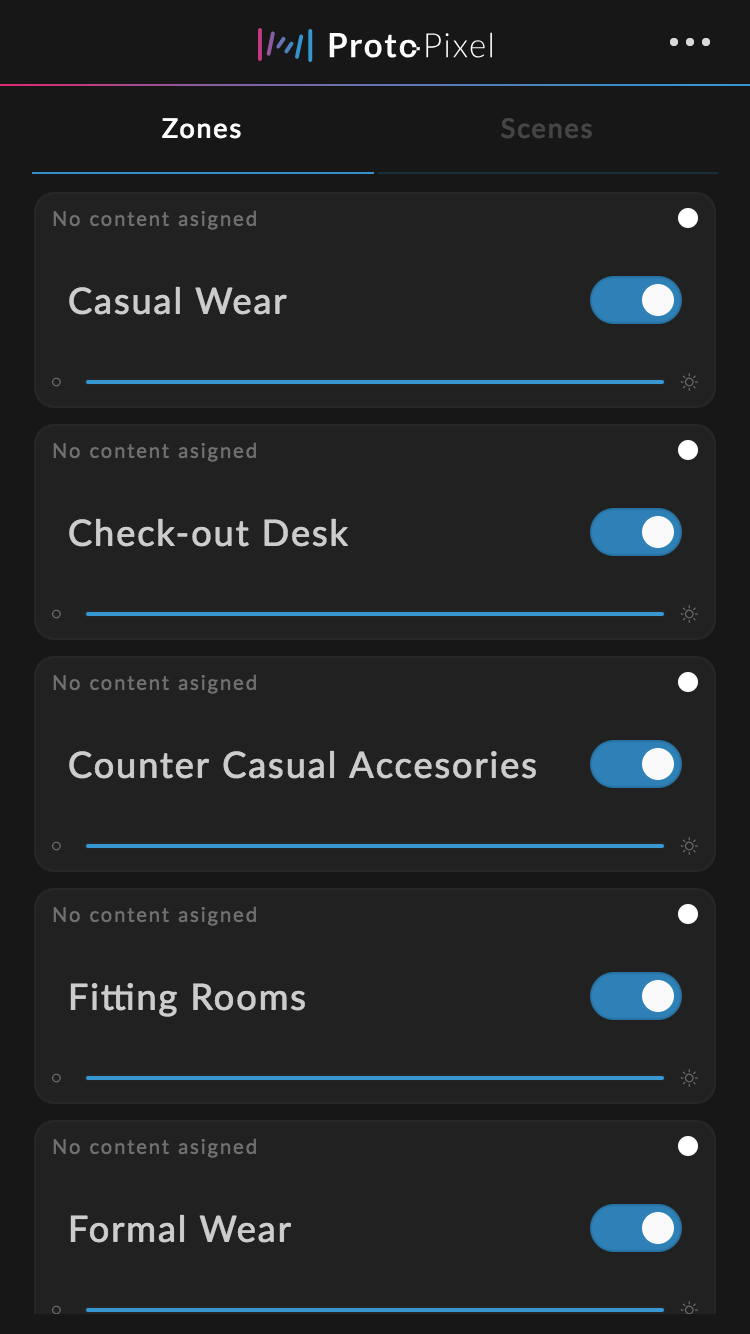
When activated, you will see the main view of the app, the Zones tab. Which displays the available Light Zones with an overview of its configururations.
Main View of the Manager
Zones
Light Zone
Represents a Light Zone, here you are able to see some parameters of the zone and enable or disable the zone.
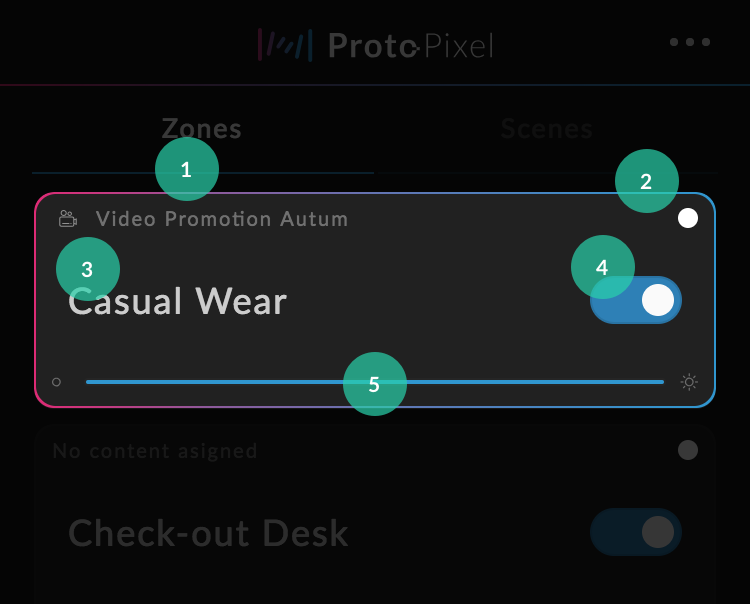
Representation of a Light Zone
- Icon and name of the content of the zone
- Color of the zone
- Name of the zone
- Turn ON or OFF the zone
- Brightness amount of the zone
When you tap on a zone you will be able to see its controls (Zone Controls).
Light Zone Controls
Visible when a Light Zone is selected. It displays the main parameters that you can change for the Zone.
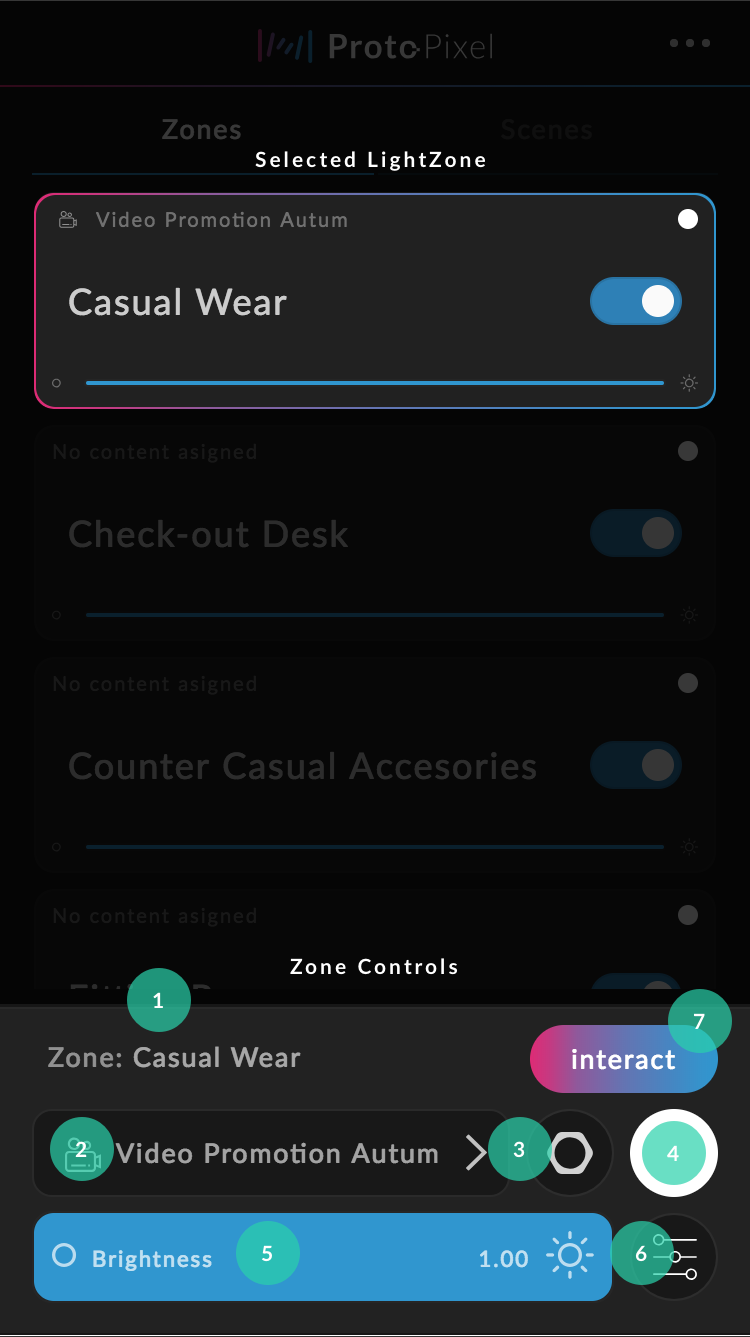
Selected Light Zone and the Zone Controls area
Name of the Zone.
Content assigned to the zone. It opens the Light Zone Contents View in order to change the content assigned.
Parameters for the selected content. Opens the Content Parameters View.
Note
Take into account that the content that you are using for the zone could be used in multiple zones. So when you modify a parameter you are modifying all of the zones that have the same content.
Base color of the Zone. Opens the Light Zone Color View.
A Slider to modify the intensity level of the zone.
Brightness of every individual fixtures within the Zone Light Zone Brightness View.
Note
How is brightness of a fixture computed?
There are several controls that affect the brigness of a fixture:
* Intensity level of the zone
* Brightness of the individual fixture
* The color of the content
All these factors affect the final brightness of a Fixture, So if a fixture is set to 0.5 brightness,
and its zone is set to 0.5 intensity level, using a content that is white will produce:
0.5 * 0.5 = .25, so a quarter of the full white.
- The Interact Button, which only appears when a interactive content is selected.
Light Zone Color View
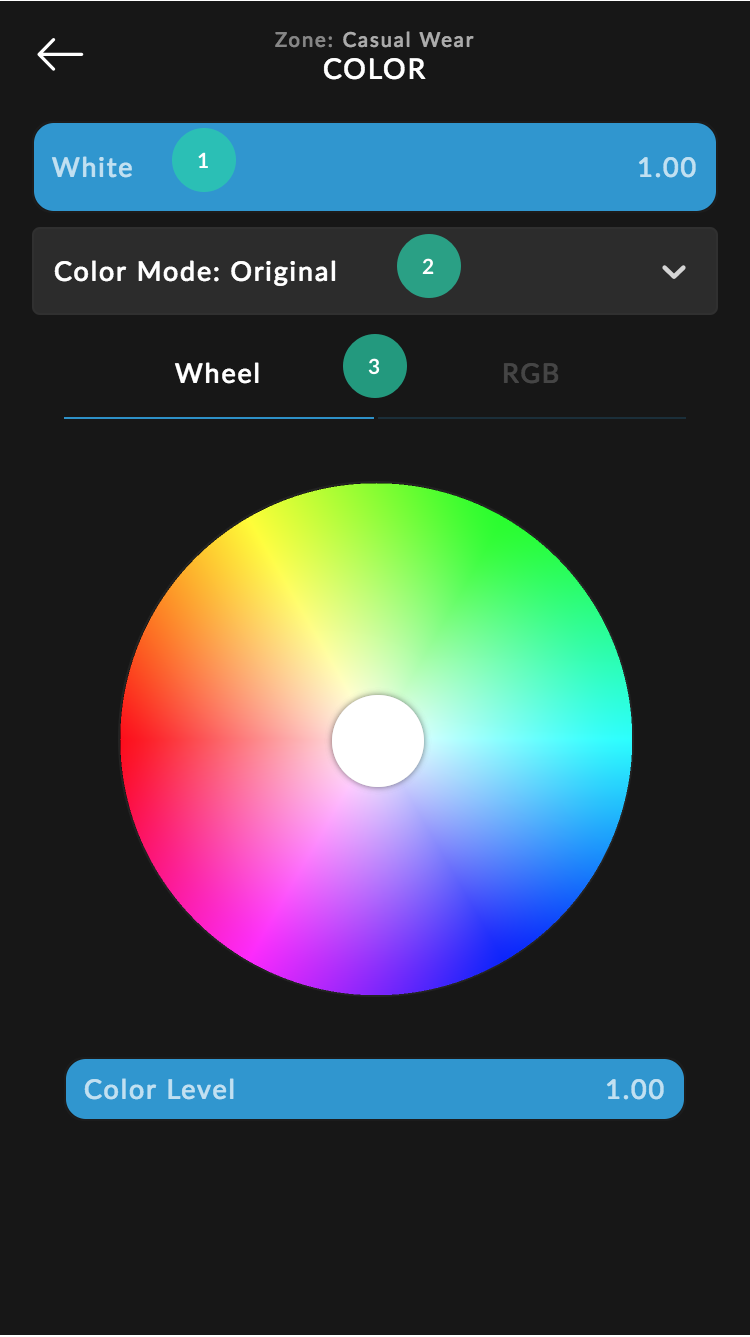
Color View with Wheel Color Tool selected.
Accessible from the Zone Control area, this view allows you to change:
- The White level of the Zone ( Works, only if the fixtures inside are RGBW )
- The Color Mode: (Original, Monochromatic and Color)
- Original: Use the original color of the content.
- Monochromatic: Tints the content with a single color.
- Color: Overrides the content and uses a solid color.
- Color Tools.
- Wheel Control the color using a HSL Color Wheel.
- RGB Controls the color using RGB.
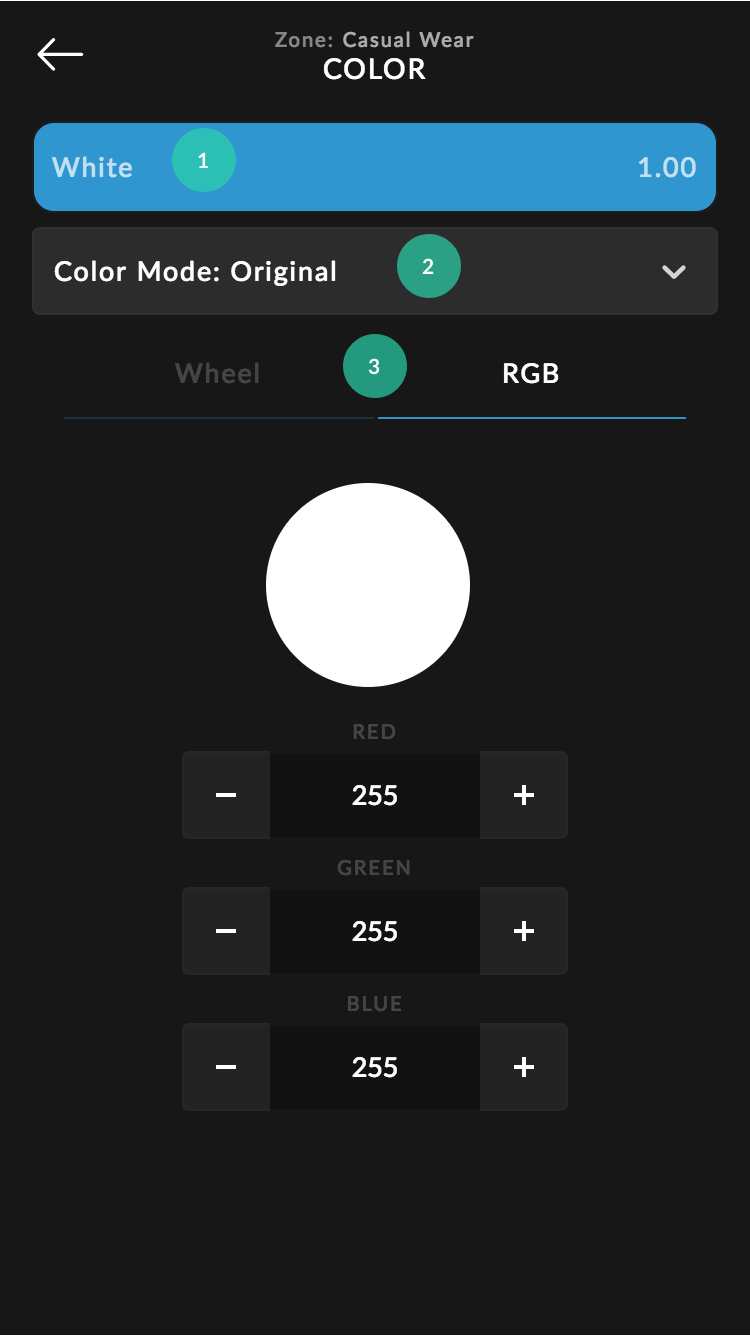
Color View with RGB Color Tool selected.
Light Zone Brightness View
Manage the brightness of each fixture within your zone.
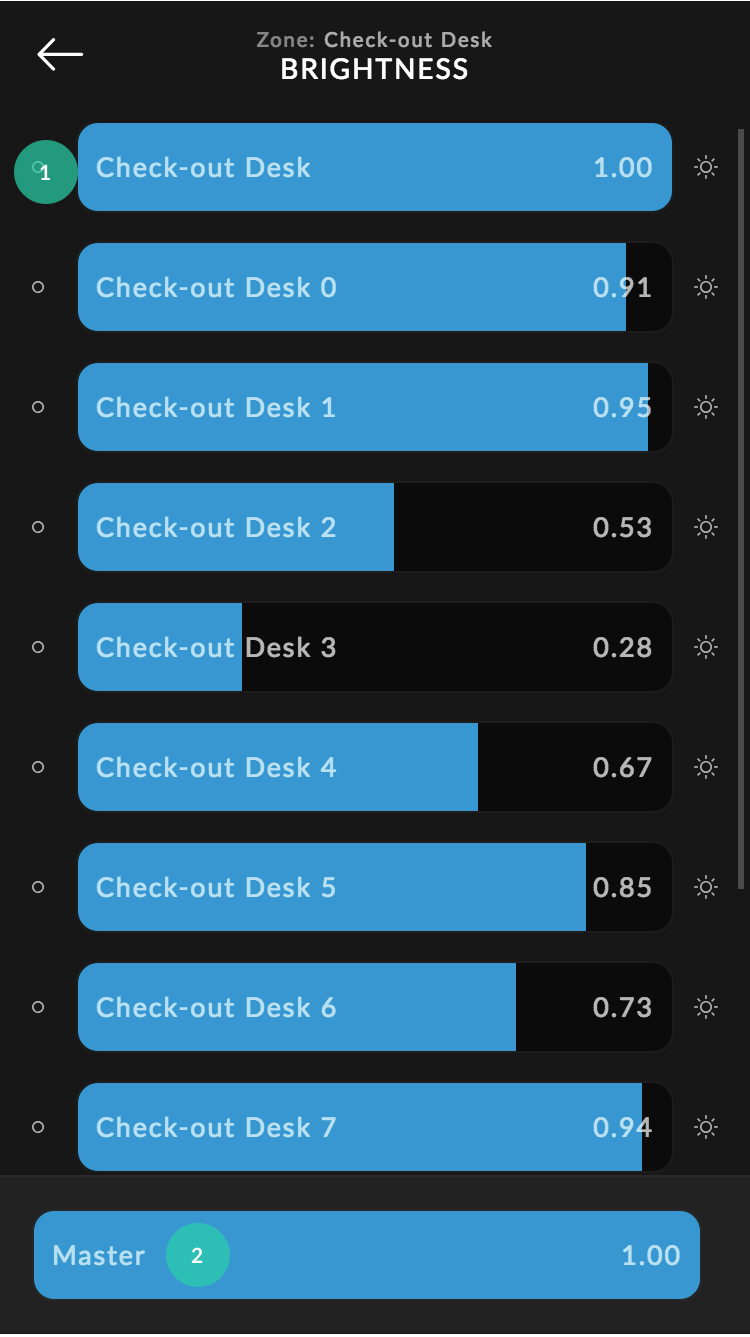
Light Zone’s brightness view with multiple fixtures
- A fixture.
- The Master Slider, it is the main value, all the fixtures are relative to it.
Light Zone Contents View
Displays the list of available contents for the zone.

Contents View with no content selected
Content Parameters View
When a content is assigned to a zone, you will be able to modify the parameters of the content (if available).
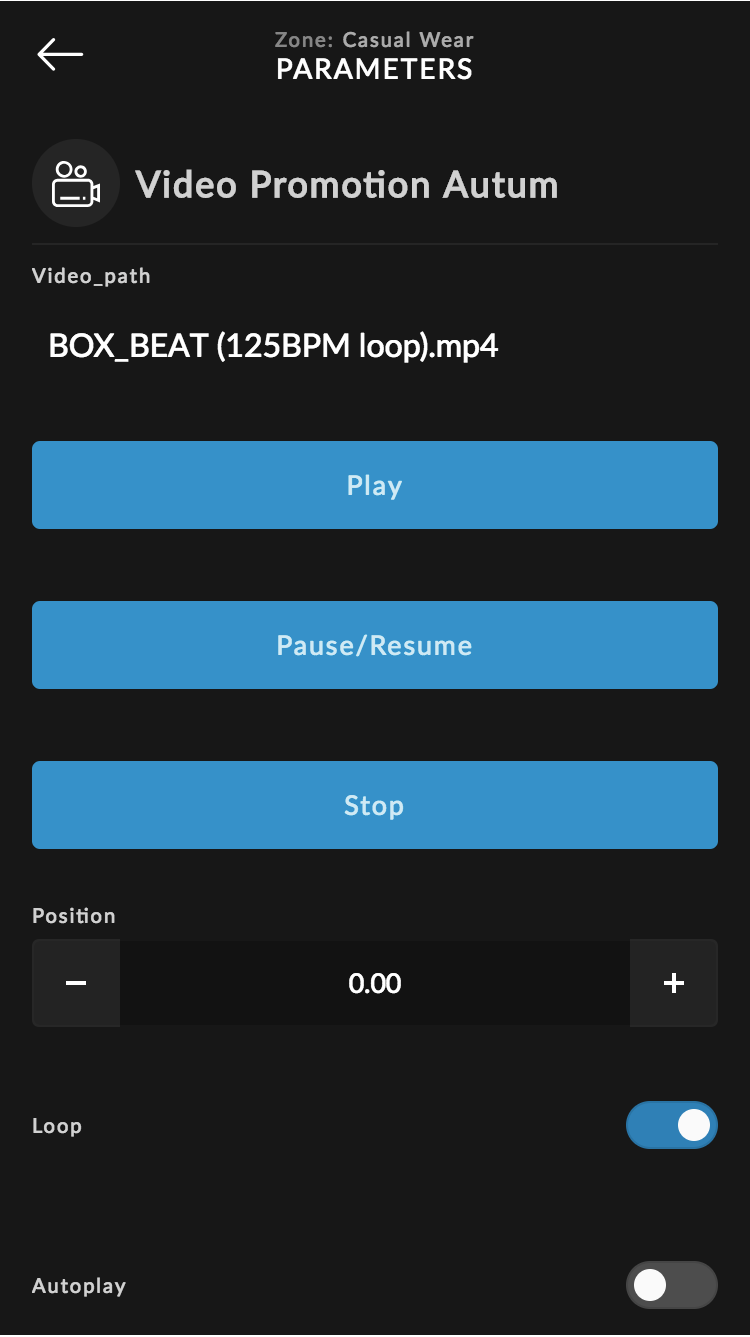
Parameters View of a Content of type Video
Scenes
Once you finished configuring your zones you will want to save the configuration with a name. These are the scenes. You can have several saved scenes to recover the configurations with a single tap, very neat!
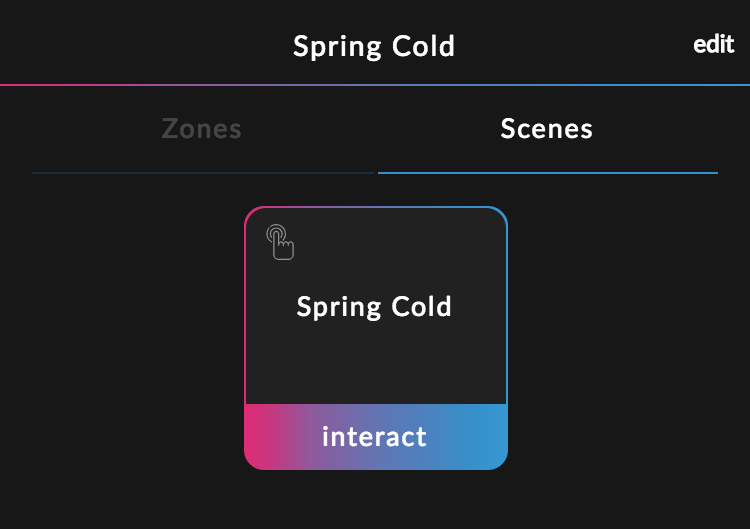
Scene View
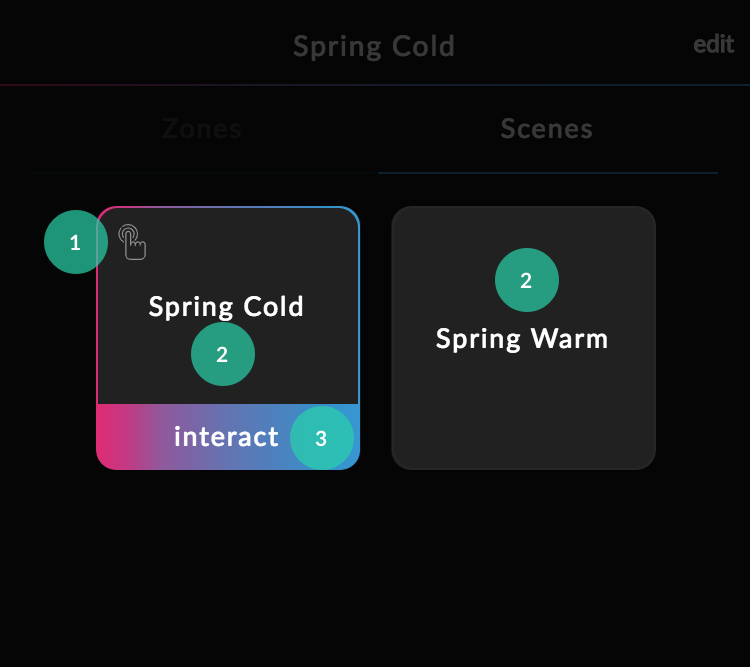
Scene Views, Enabled and Disabled
- The interactive icon, it indicates that the scene has interactive contents
- The name of the scene.
- Interact appears only when the current scene has at least one interactive content. When tapped, it displays a selector of interactive contents.
Saving a scene
In this view you will see a list of your saved scenes.
- Save a new scene using the + button

Empty Scenes
2. Once you have saved your first scene, it will appear on the Scenes View and it’s name will be at the top of the view.
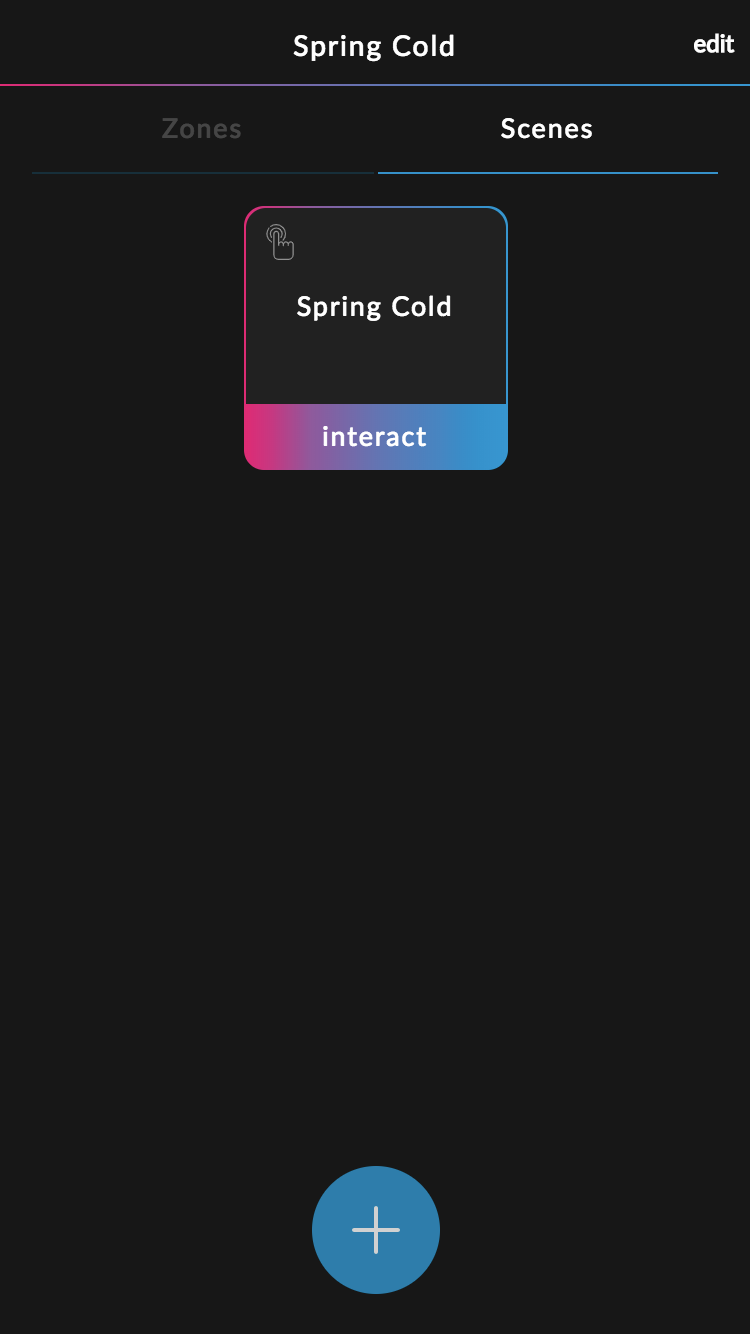
My first Scene
Update or discard?
- When a Light Zone has changed you will see two buttons:
- Discard changes (in red) You will loose all of the changes and return to the previous state. You can also discard the changes by selecting a different scene.
- Update Changes (in blue) The new changes will be written in the selected scene.
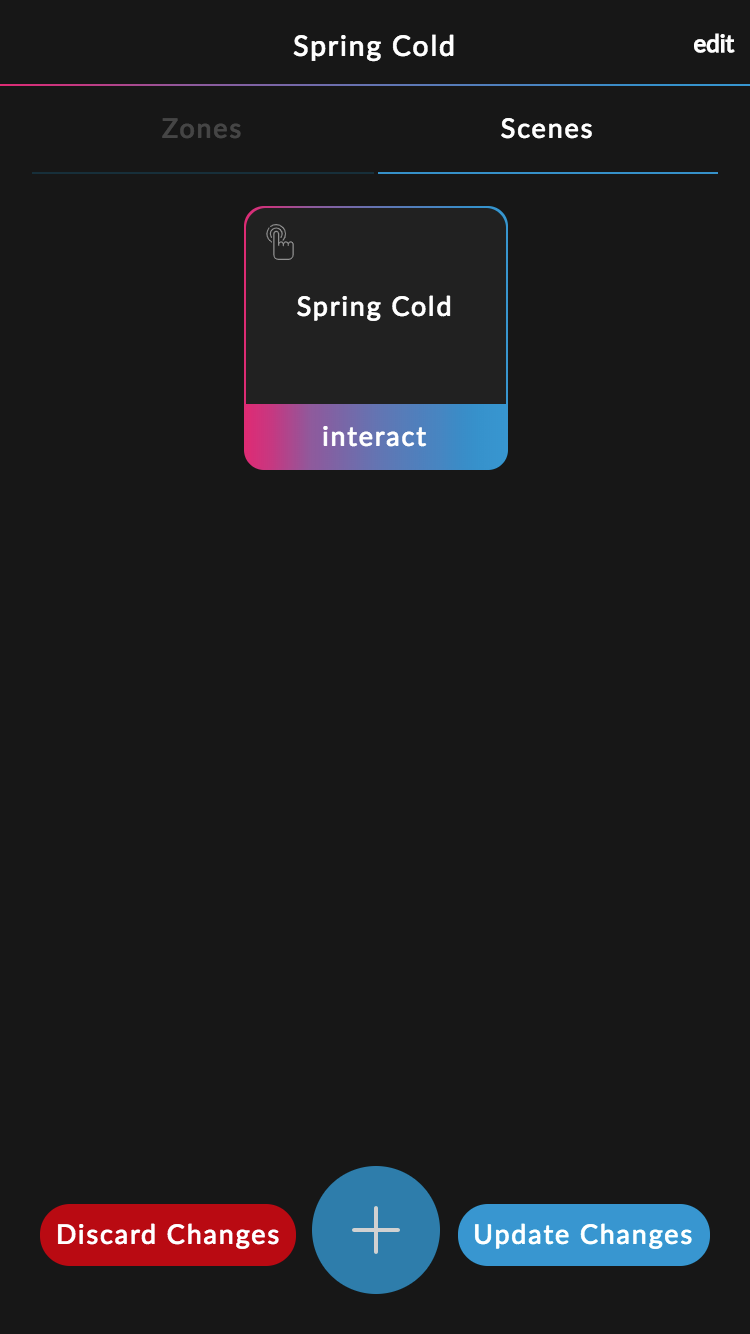
Discard or update
How to edit the scenes
In the top right part of the view you can see the edit button. Tap on it to enter edit mode.
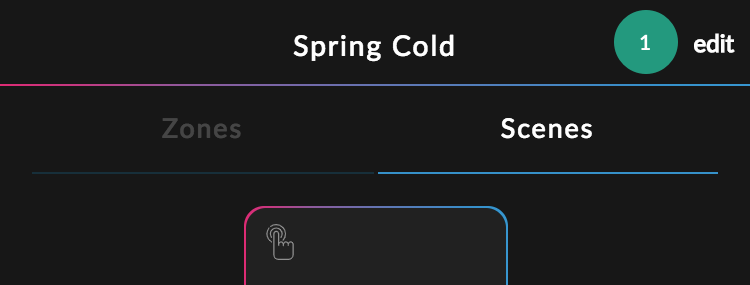
How to Enable Edit Mode
In this mode you can:
- Finish editing (exit edit mode).
- Delete a scene.
- Rename the scene.
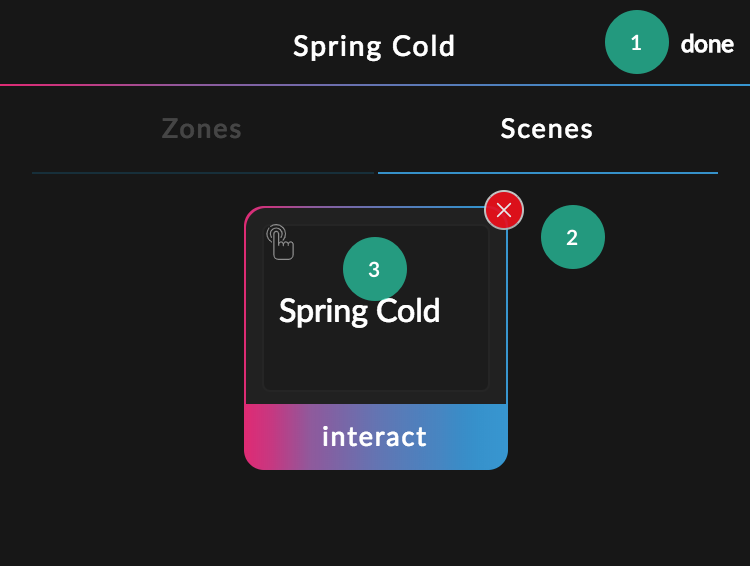
Edit Mode
Interactive Contents in Scene
In this list you will be able to see, detailed information of the zone and the name of the interactive content. But first we need to know how to launch it.
Launching the Interactive Contents List
When you tap on the interact button a list with interactive contents will appear.
Tapping on any of this contents will display the interactive view.
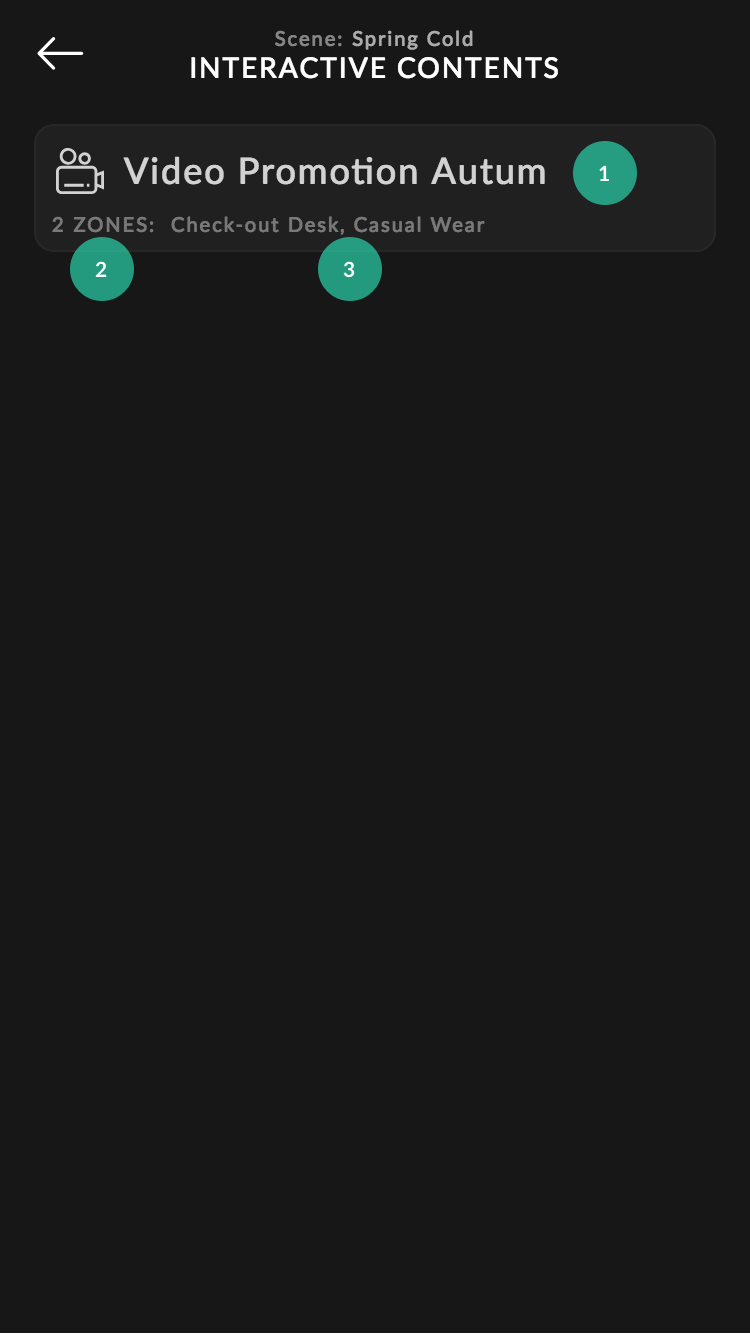
Interactive Contents List
- Icon and name of the interactive content.
- The number of zones where that this content is applied to.
- The name of the zones the intactive content is applied to.
UDP/OSC Remote interface
It is possible to control the Manager using the UDP and OSC messages. The commands are:
    # Change scene by scene order number (starting at 0)
    /Scene/change <scene number>

    # Black out
    /Scene/off

    # Remove Black out
/Scene/on