Connecting ProtoPixel 1 Channel WiFi Controller
Parts
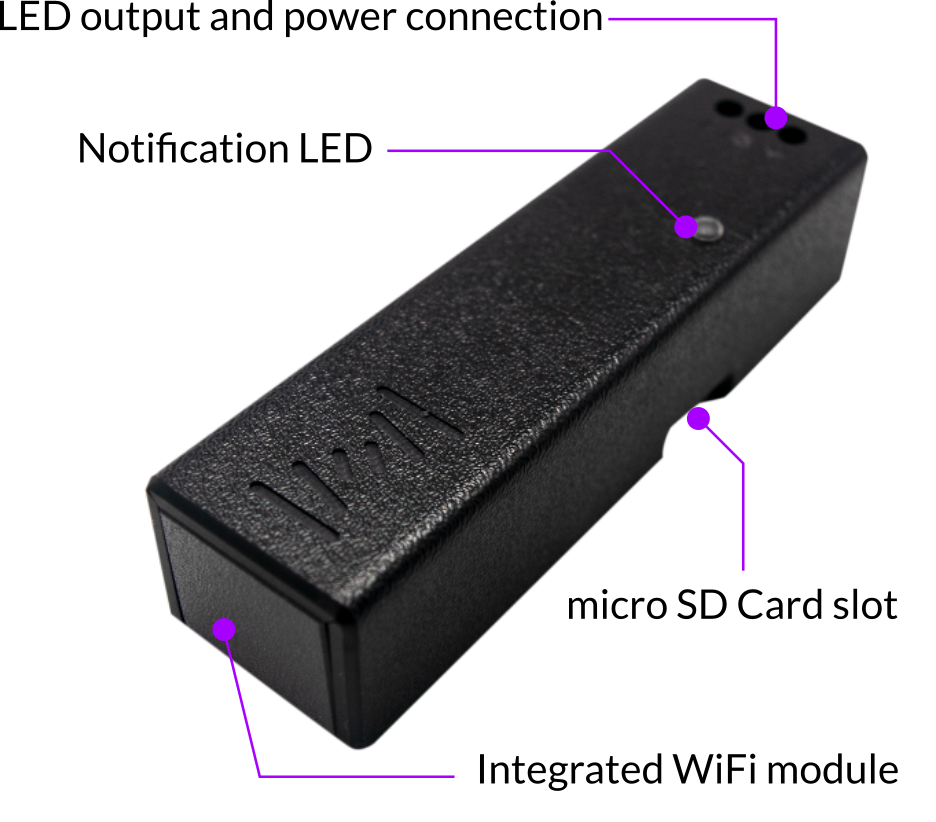
The ProtoPixel 1 Channel WiFi Controller has the following parts:
- Micro SD Card Slot: A micro SD Card with LED recording can be introduced here for autonomous playing.
- LED output and power connector: Connect your LED fixture here, to both control the fixture, and power the controller.
- Notification LED: This is an indication LED. See next section to see its possible states.
LED status states
| State | Meaning |
|---|---|
| OFF | Controller does not have power |
| ON | Controller is configuring network |
| Blinking slowly | Receiving Data / Playing SD contents |
| Blinking fast | Error reading SD card |
Correctly connecting the controller
This controller has only one port where to connect wires:
- LED output and power connector: A three pin connector that powers the controller and sends data to the LED strip or fixture.
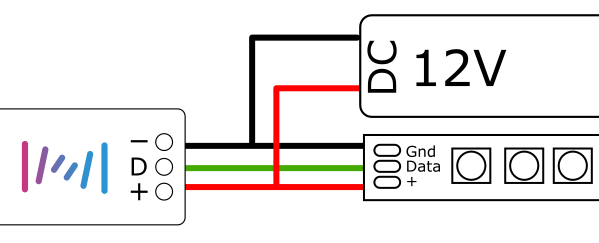
To power the controller it must be connected to a powered LED fixture. Usually, the fixtures have a 3-wire cable, consisting of positive (+5v or +12v), negative and data. Please refer to Wiring Led’s data signal to the PPx satellite to understand how to identify them.
Connect the three wires in order to both power the controller and control the LED fixture.
Important
The cable from the controller to the LED fixture can’t exceed 20 cm.