Operational Guide
This section contains step-by-step instructions for setting up a ProtoPixel Create project, connecting controllers, adding different lighting fixtures and mapping media content.
Creating a new Lighting scenario
Whenever ProtoPixel Create is started, it creates a new (and empty) project. Alternatively, you can create a new project by clicking on the new project icon in the toolbar, or alternatively with (Cmd-N ).
Creating a Fixture
To create a new Fixture, you can click on the Fixture tool in the toolbar, and this will present you with the different Fixture alternatives to be created. Click on the desired fixture type to create it. The new Fixture will appear in the Workspace, selected. Alternatively, you can use .
The fixture will have a default name derived from its type. You should change its name to be descriptive as it will identify the fixture in other parts of the program. You can do that in the inspector panel.
Selecting Workspace Elements
You can select various Workspace Elements (such as Fixtures and Contents) to operate on them at the same time.
To start a multiple selection you should hold ⌘ and then Click the elements you want to select, either on the Workspace or on the Scene Panel. You can also square-select elements by click and dragging the pointer across the Workspace.
Configuring and Manipulating an Element
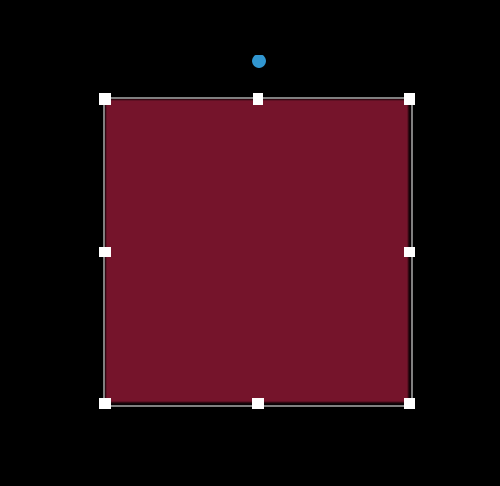
When clicking an Element in the Workspace, a Gizmo will appear, allowing you to transform it.
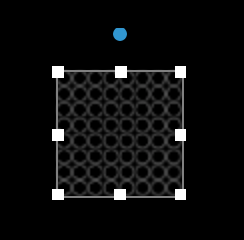
To move it around, just drag it with the pointer. To rotate it, drag the rotating handle (blue) (press ⇧ to rotate in 15º steps). To scale it, drag an edge of the bounding box. To recover the aspect ratio, use the “Aspect Ratio” button in the Inspector Panel.
You can also select various Elements to apply some these operations collectively.
When selected, the Element’s properties are displayed in the Inspector Panel.
Aligning and Distributing Elements
You can align the selected Elements by using one of the Alignment and Distribution tools in the menu.

The alignment tools include vertical and horizontal alignment to the center and extremes. The distribution tools work both vertically and horizontally. The alignment is always done using a selected group of elements as a reference.
Copying and duplicating Elements
You can copy and paste Elements using ⌘+C and ⌘+V key combinations, or using the menu ( and ). You can select any number of items to be copied. Pasted items will maintain the properties of the original, with a position offset. Pasted elements get automatically selected.
You can perform a quick copy-paste action by duplicating the items: ⌘+D or .
Configuring Fixture properties
In the inspector panel you can change many different properties that will affect how the fixture will interpret the colors in ProtoPixel.
The first properties you will see are the ones defining the size, shape and connection of the fixture. These will vary between fixtures.
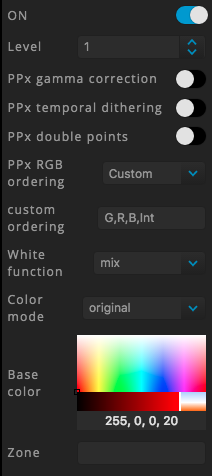
Afterwards you will see a series of parameters:
| Parameter | Function |
|---|---|
| ON | Switch on and off the output for this fixture |
| Level | Intensity of the light of the fixture |
| PPx gamma correction | Apply a gamma correction to the color |
| PPx temporal dithering | Try to get finer grade colors by adding some noise |
| PPx double points | Every pixel of the fixture should be sent twice |
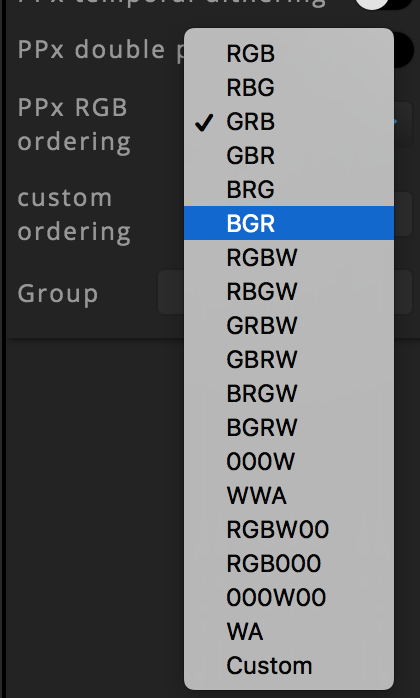
| PPx RGB ordering | List of preset byte orders. This will depend on the fixture hardware. |
| custom ordering | In case of set a custom RGB ordering you can define the ordering manually here |
| White function | Select how the white component is calculated |
| Color mode | Select how the color should be applied |
| Base color | Color to be used as a base, depending of the Color mode |
| Zone | Define the Manager Zone |
White Functions
There are several ways the white component can be extracted from the RGB color:
- mix: The white component is extracted from the color, and use as the white level. This means that pure white colors will not use the RGB components. Please don’t use this function in a fixture that does not have white component, as it will get incorrect colors.
- average: The white component is calculated as the average of the RGB components. You will get slightly whiter colors this way.
Color modes
Select how the fixture should use the color from the content:
- original: The original RGB is used.
- monochromatic: The intensity of the color is used to modulate the Base color.
- color: This will ignore the original RGB color alltoghether and use straight the Base color.
Creating and Configuring a Controller
In order to communicate with the real world Fixtures and send them the lighting information, we have to create a connection to the physical ProtoPixel Controller and describe how the Fixtures are plugged into the device.
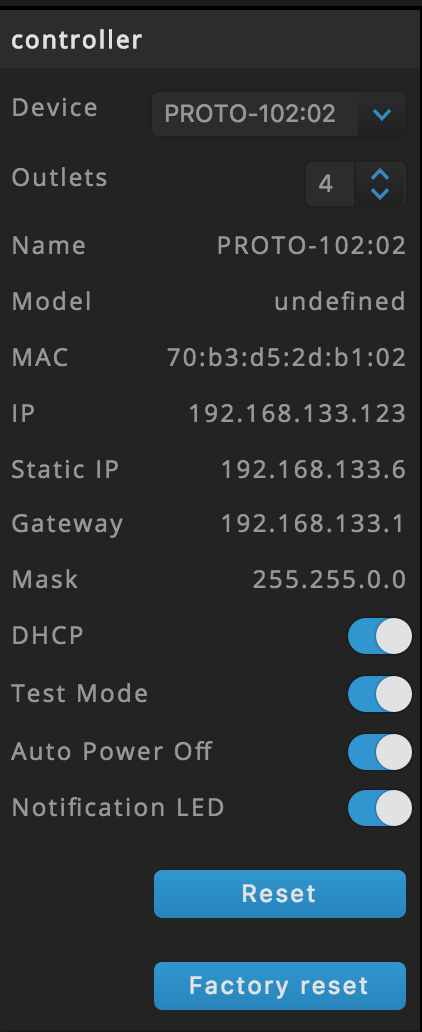
To add a Controller go to the Controllers Panel tab and click the add icon. A new Controller with a default number of Outlets (4) will be created. You can change the number of outlets in the Inspector.
Now there are two actions left:
- Adding Fixtures to Outlets
- Connecting the Controller to a Device
Adding Fixtures to Outlets
Because ProtoPixel Controllers don’t have any information of how fixtures are connected to them, we have to describe all that in the software so it can send the color information in the matching order to the Controller.
First we add the Fixture to the correct Outlet. To do that, first select the Fixture. This will display its properties in the Inspector. Then change the assigned controller and outlet using the list.
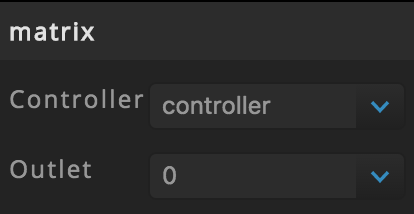
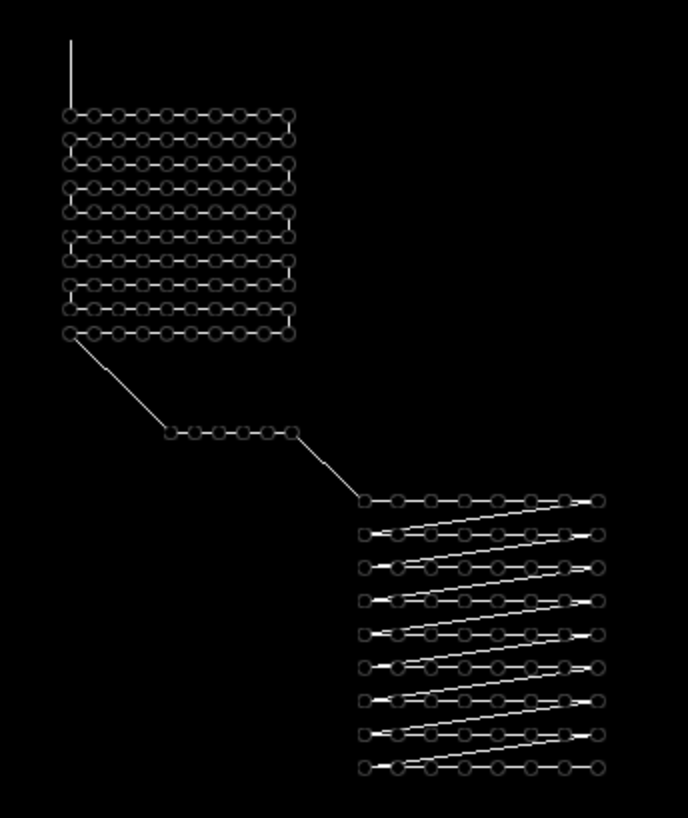
Then, if more than one fixture is added to the same outlet, we have to define the correct order in the outlet, to match the reality. To do so, select the Outlet in the Controller Panel, and drag the fixtures in the inspector to sort them.
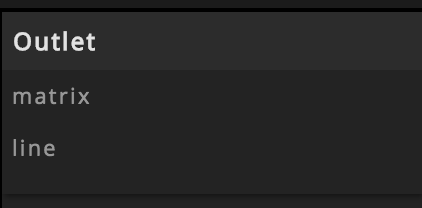
A preview of the selected outlet wiring will appear on the workspace the moment you select it. The start of the outlet is represented by a vertical line.
Connecting a Controller to a Device
Now that we have added Fixtures to Outlets, we have to pair your Controller to a real Device. ProtoPixel Controllers are automatically discovered when connected to the same network as your computer.
To pair a controller to one of the discovered devices, select the Controller (this will show its properties ) and choose the device from the list. This will show you the Device’s properties in the Inspector as well.
Note
If the Controller cannot connect to the Device, its name will appear red in the controller panel until it reconnects again.
Note
Some controllers may be inaccessible depending on where they have been connected. Create may be able to see them but will be unable to connect to them or send them data. In these cases a warning with relevant information will be shown next to their current IP property.
This usually means that the device is seen in another subnetwork. Ensure that all controllers are on the same subnetwork as the computer running Create and that the network mask allows them to connect.
You can manipulate some of the parameters of the device in the inspector, depending on its capabilities. See the table in Configuring the controller for more information.
Note
Depending on the type of LEDs that you are using you may have to change their RGB order in order to correctly map your colors in the real world.
To do so, select all affected fixtures and change their “PPx RGB ordering” property.
Adding Content
Now that we have Fixtures in the Workspace and we mapped them to real world Fixtures, we can start mapping content into them. First, we can create content in the workspace by pressing the Content menu in the Toolbar, or by using the menu. We then choose the type of the content we want to create.
Some of the content types need a file to work (images, videos, scripts). Those contents can be created by dragging the file directly into the workspace.
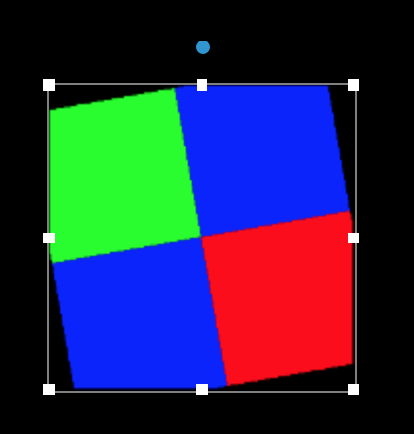
As an example, we could create a Test content that can help us to test if everything is correctly set up at the end. This content consists only of four squares of different colors rotating.
Several types of content are bundled with ProtoPixel Create:
- Color
- Image
- Video
- Script
- Syphon
- Test
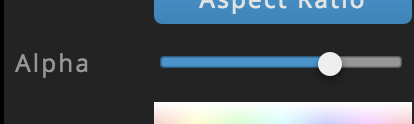
All types of content have an Alpha parameter that can be used to change their transparency.
Also, some contents can be configured on how they align:
| Parameter | Meaning |
|---|---|
| texture filtering | Define if the pixels should blur between them |
| texture horizontal | offset move the content texture horizontally |
| texture vertical | offset move the content texture vertically |
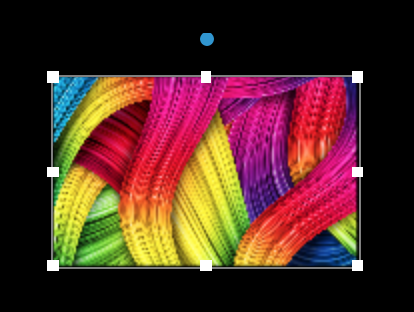
Video
Plays a video and maps it to the lights. Controls for play and stop the video are provided in the inspector. You can also set the volume and loop the video.

Although ProtoPixel Create can play many video formats we recommend the following:
- container: mp4 (MPEG-4)
- resolution: 1280x720 or less
- codec: H.264
Test
This content provides a quick way of testing Content on Fixtures. It is an endless video of colored squares, rotating.
Syphon
You can create interactive content with other programs, such as Resolume, Modul8, Millumin or even audiovisual interactive tools like Processing, and import the image content directly into ProtoPixel using Syphon technology. In order to use this technology inside ProtoPixel Create, activate the Syphon output inside the software you would like use.
Then add a Content > Syphon and select the application from the Source drop down menu in the INSPECTOR panel. The content should appear in the view ready to be mapped, as any other content.
NDI
Similarly to Syphon, you can create interactive content with other programs, but in other computers in the same network and import the image content directly into ProtoPixel using NDI technology. In order to use this technology inside ProtoPixel Create, activate the NDI output inside the software you would like use.
Then add a Content > NDI and select the computer/application from the Source drop down menu in the INSPECTOR panel. The content should appear in the view ready to be mapped, as any other content.
Script
ProtoPixel Create provides scripting capabilities to create interactive content natively. It is based on the Python programming language, and has bindings to openFrameworks, a popular creative coding library. You can refer to the provided examples to get familiar with the specifics of ProtoPixel Scripts.
We recommend using a Python-aware editor (such as pyCharm or Sublime Text with Python addons) to edit the scripts externally. When saved, the programs will reload automatically in ProtoPixel. The library pyOpenGL bindings can also be used natively for advanced graphics generation in scripts, once installed separately.
To use a Script Content, create a python file and import it to ProtoPixel Create. Any error on scripted programs will be shown in the Log Window.
You can add various input elements to the properties of your script during execution. Create will check for new inputs every time you click on the script content.
Exporting your Project
There are two kinds of projects:
- The bare project is a file with a
.ppxprojextension. It is created when you save a project. It only contains the essential parts for it to run on your computer. - The bundled project is a file that also has a
.ppxprojextension. It is created when you export a project. It contains a bundle of all assets needed to run your project on any computer (videos, scripts, …).
To export your project go to or use ⌘-E
Global Settings
There are some global settings that can be accessed through the global settings button in the Toolbar.
- Installation Name : we will use this name to tell you about expiring subscriptions or other installation-related event.
- Starting Project : is a path to a project that will load automatically when running ProtoPixel create. It is intended for autonomous installations.
- Async Rendering : In general you should keep this activated for performance reasons. Some older systems will actually work faster without it.
- Autosave : the program will periodically save your work, so in case of an outage or a crash you can recover it. When starting the application, if a backup project is found, a dialog will ask you if you want to recover it.
- Process Sound : process sound input for scripts that may need it.
- Global Framerate : Limit the framerate of the app globally.
- Preview Quality : Limit the quality of the preview in ProtoPixel Create. This does not affect the quality of the LED output, but reducing it may improve performance.
- Recorder Devices : see Recording Output for a single SD controller.
- Manual Artnet Devices : see Manual Art-Net Configuration
- Scheduler : see Scheduler
- Recording : see Recording Output for a ProtoPixel Player